easy recipe

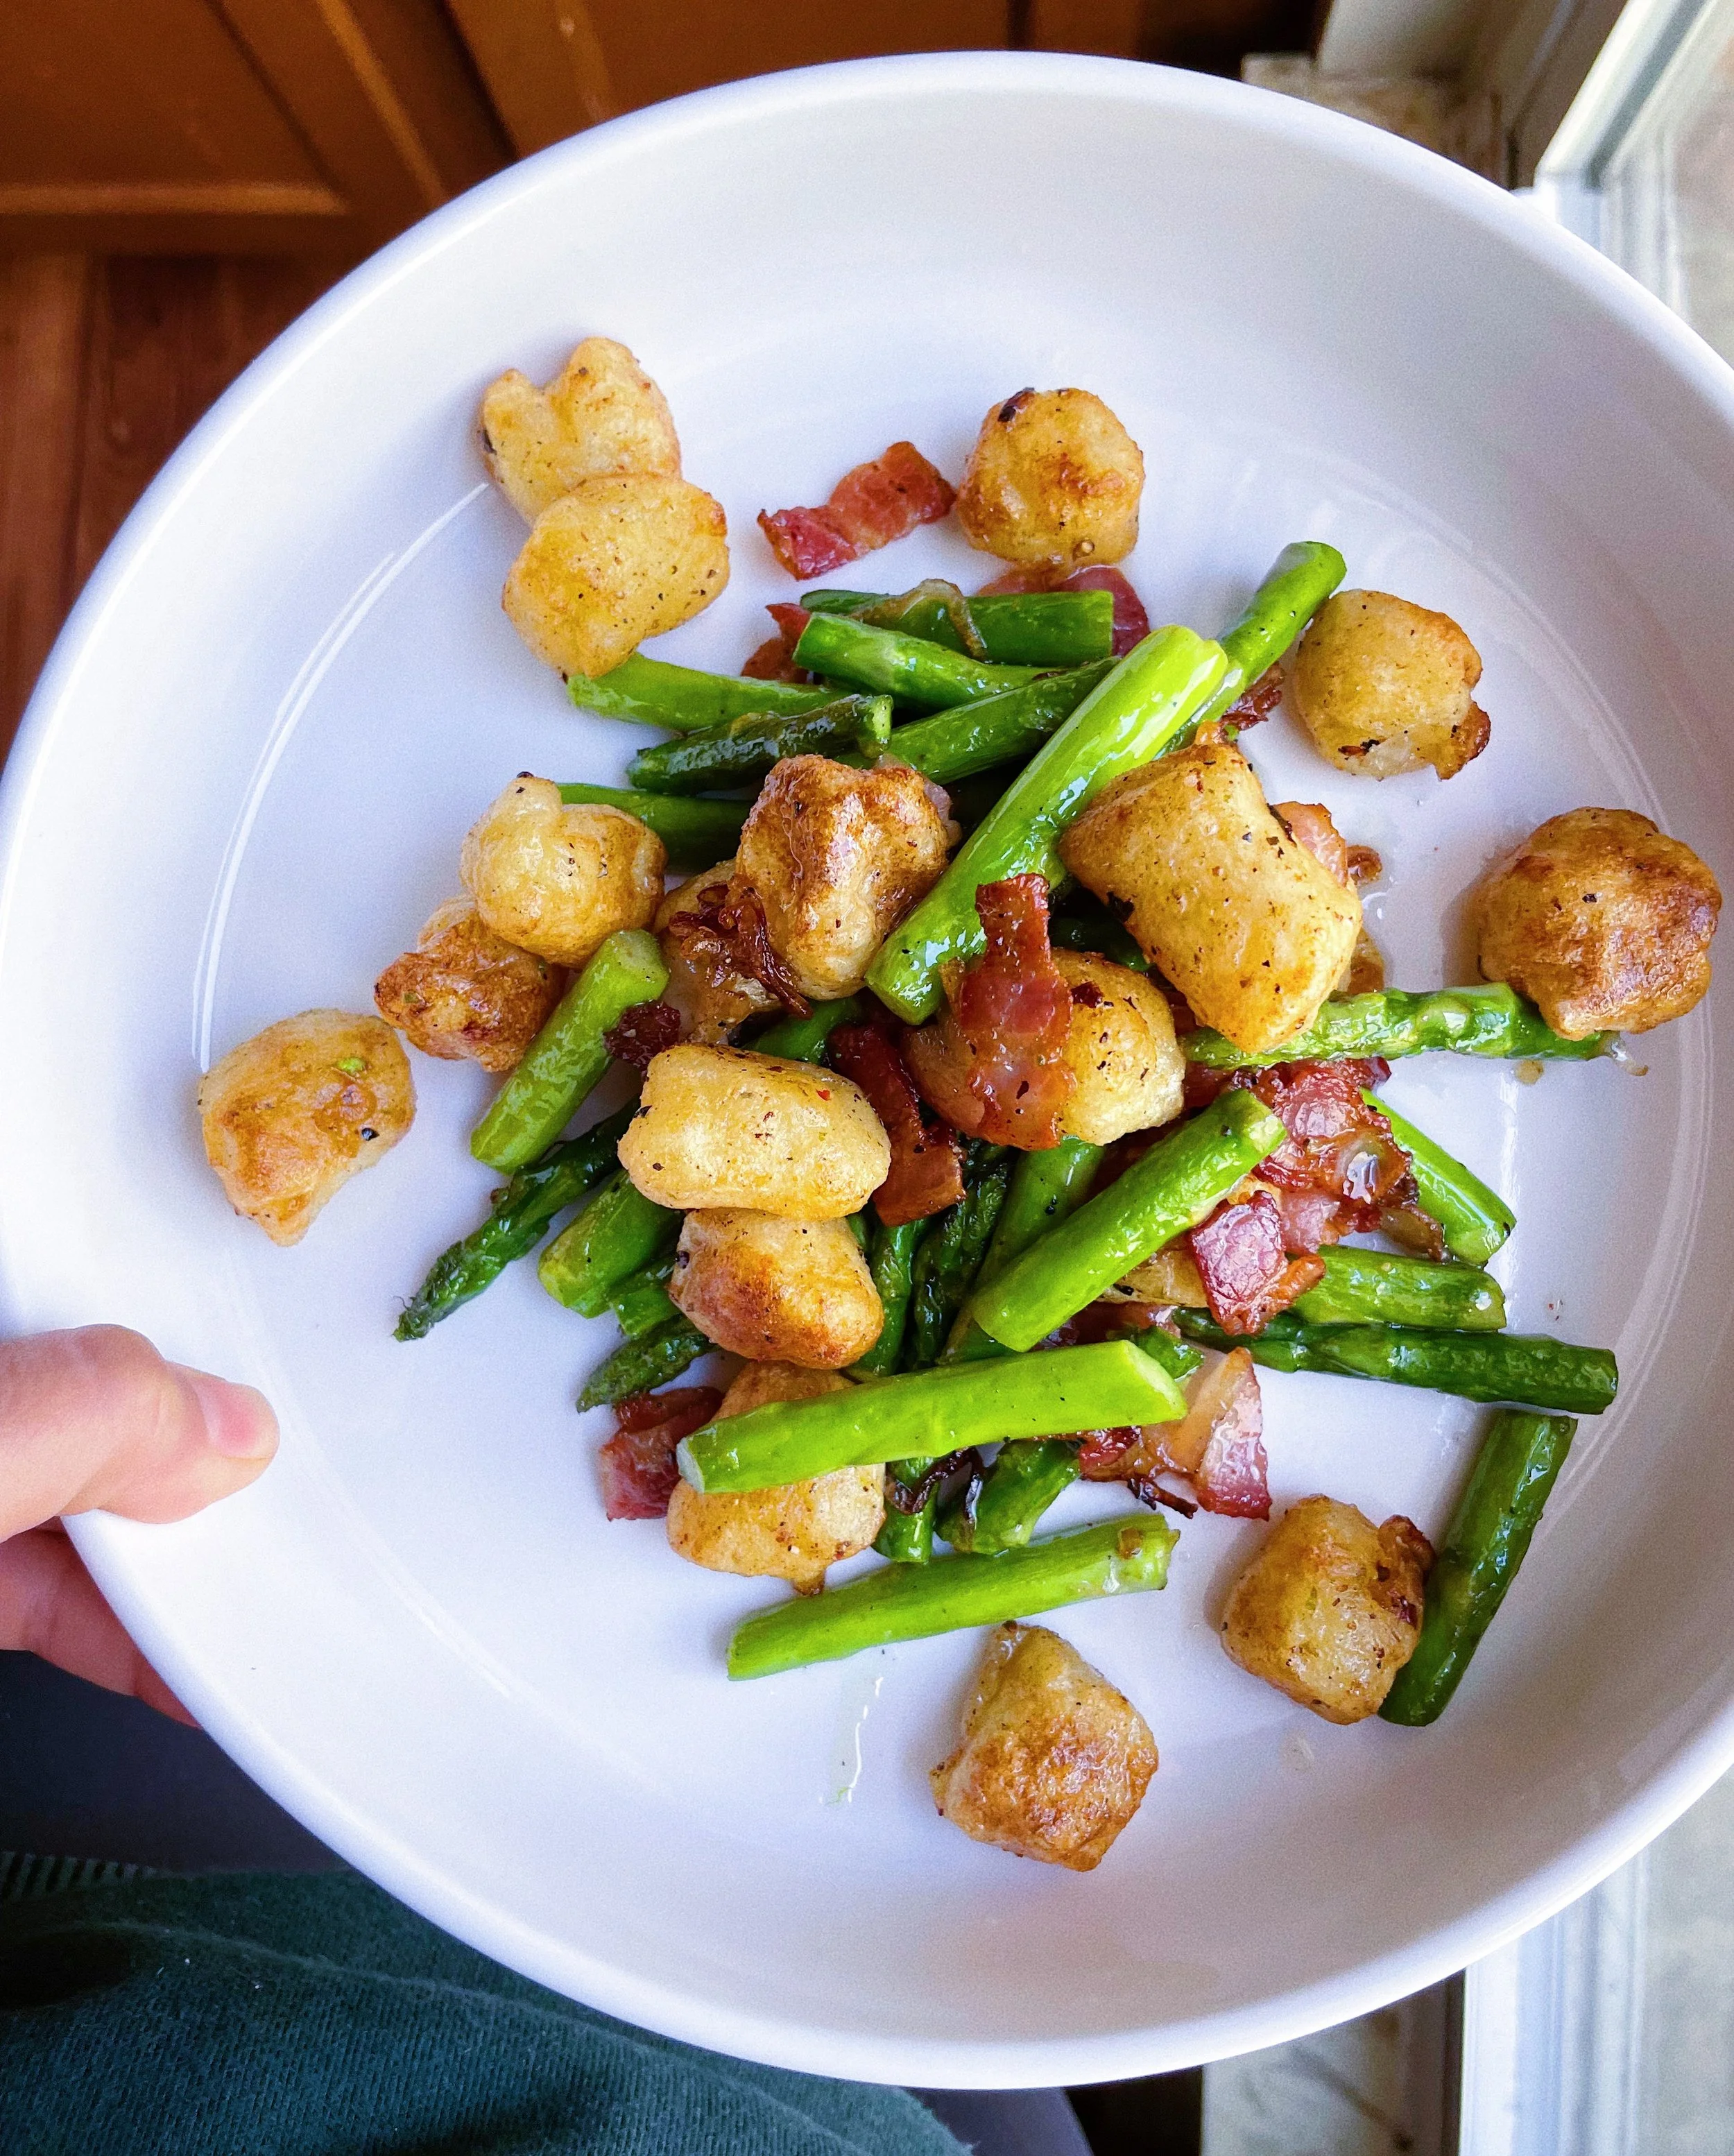
Bacon + Asparagus Cauliflower Gnocchi (Gluten-Free and Paleo) by emily penn

I whipped up this dish on a whim on a Wednesday night but it turned out so rich in flavor and so satisfying that I had to share it with you! The best part is - it only takes about 15 minutes.

I’ve been eating the cauliflower gnocchi from Trader Joe’s for years, but I’ve never quite mastered the pan-fry method. Because I have an air fryer now, I tried throwing the gnocchis in there and it is a game changer. They come out fluffy and chewy on the inside, with a crisp outer shell. It’s truly *chef’s kiss*.

That being said, if you don’t have an air fryer, I would recommend baking them for best results. If you have mastered the pan-fry method, I’d suggest doing that in a separate pan from the other ingredients.

This quick, easy weeknight meal is sure to impress - even if it’s just yourself!

A note about the portion - this *technically* made two portions but they felt a little small to be honest so if it’s for two people, I would serve with a side salad or another veggie. If left alone… I probably would have eaten all of it hehe 😅

Bacon + Asparagus Cauliflower Gnocchi (Gluten-Free + Paleo)

Serves 1-2

ingredients

1 bag cauliflower gnocchi from Trader Joe’s
4 slices sugar-free bacon, chopped into bite sized pieces
1 shallot, thinly sliced
12 oz package of asparagus, chopped into bite sized pieces
1 tbsp butter (or olive oil for paleo option)
Lemon zest (optional)

directions

  1. If you have an air fryer, get those babies going according to package directions (I sprayed with a little avocado oil and added salt and pep - this is optional). If you don’t have an air fryer, then bake or pan-fry (in a separate pan) according to package directions.

  2. While that’s cooking, heat a large skillet over medium heat. Add the bacon and cook until the fat coats the pan - just a couple minutes. Then add the shallots.

  3. Cook until bacon and shallots are looking golden and crispy, another 5ish minutes.

  4. Turn the heat up to high and add the asparagus and cook for about 4 minutes, stirring frequently until it turns bright green. You want it to still have some crunch, but not be raw.

  5. Your gnocchi should be done around now. Turn the heat on low for your pan with the bacon, shallots and asparagus in it. Add the butter or olive oil, then add the gnocchi. Stir well until everything is mixed together and warm.

  6. Top with lemon zest, salt and pepper as desired.

  7. ENJOY!

Paleo Kimchi Fried Rice (It's Vegan, too!) by emily penn

photo 14.jpg

My favorite part about cooking for other people is getting out of my comfort zone. We tend to cook what we know or variations of it - over and over again. Which is nice in terms of preserving mental energy and saving time, but can get a little boring when it comes to the food we end up eating over and over.

I had never made kimchi fried rice until I had to for a client a few weeks ago. And when I tasted the end product to make sure it was up to par, I was blown away. I wanted more of it in my life!

I don’t do a whole lot of grains - I find that I feel better when I limit my intake of them. So I wanted to see if making kimchi fried rice with cauliflower rice would still get the job done. (If you’re curious how they affect you, eliminate them for one month and then reintroduce them.)

I must warn you - it of course doesn’t have that same sticky, starchy mouth feel that actual rice has, and you shouldn’t expect it to since cauliflower isn’t starchy. But in terms of flavor and satisfaction? It totally still delivers. I love love love the pungent, spicy flavor burst from the kimchi mixed with the mellow nuttiness of the sesame oil.

While you can totally enjoy this recipe all on its own as a small meal or snack, it’s meant to be more of a canvas. It’s up to you how you want to make it into a full meal - top with a fried egg or scramble some in, serve with chicken or pork, bulk it up with lots of extra veggies. The options are entirely in your capable hands!

A note about kimchi + probiotics - cooking at high heat kills the probiotics in fermented foods (and which is probably why I’ve never made kimchi fried rice before). That’s why I strongly suggest topping the finished product with some fresh kimchi so that you get all the beneficial bacteria to keep your gut healthy and happy!

Paleo Kimchi Fried Rice

serves 1
total time about 15 minutes

Ingredients
1 cup steamed broccoli florets
2 tbsp avocado oil
¼ cup kimchi
1 cup of cauliflower rice
1 garlic clove, minced
¼ tsp smoked paprika

Kimchi Sauce
2 tbsp kimchi liquid
1 tsp coconut aminos
½ tsp sesame oil

For Serving
Green Onions
Fresh Kimchi

Instructions

  1. If you need to steam your broccoli, get it started now. Steam for 10 minutes, until tender but still bright green. Set aside. Mix up the Kimchi Sauce in a small bowl and set aside.

  2. Heat a large pan over high heat. Once pan is nice and hot add avocado oil, followed by the kimchi. Fry the kimchi for 2-3 minutes, until it starts to dry out.

  3. Add cauliflower rice, garlic, smoked paprika and half the Kimchi Sauce to the pan. Quickly stir until everything is incorporated, then let it sit on high heat for another 2-3 minutes. Cooking at super high heat and getting smoky has always made me kind of uncomfortable, but this is what you want for this dish - high heat and fast cooking.

  4. After 2-3 minutes, give the mixture in the pan a stir. Let cook for just one more minute.

  5. Transfer to serving dish. Drizzle with the rest of the Kimchi Sauce and top with green onions, fresh kimchi and any other protein or veggie you want to add. Enjoy!

Good Food: My Go-To Summer Sammie by emily penn

I live for the summers - I live for the sun and all the other activities that come with it. Camping, picnics, bike rides, outdoor concerts, beach/river days. And since forever, I was in charge of food for these events (big surprise, huh?).

When I was in high school we would drive from the suburbs of Chicago to the beaches in the city, and I would insist we stop at Whole Foods to pick up fresh fruit, chips and bevvies. One of my favorite summertime events was the free concerts held in Millennium Park. You bring your own picnic and enjoy amazing music as the sun sets over Lake Michigan. I would get food (and wine) ready for me, my best friend, my mom and whichever other friends were meeting us there.

Food for a crowd is usually not easy, but food for a crowd that you need to transport in a bag you can carry on your shoulder (plus all those wine bottles) is even more challenging.

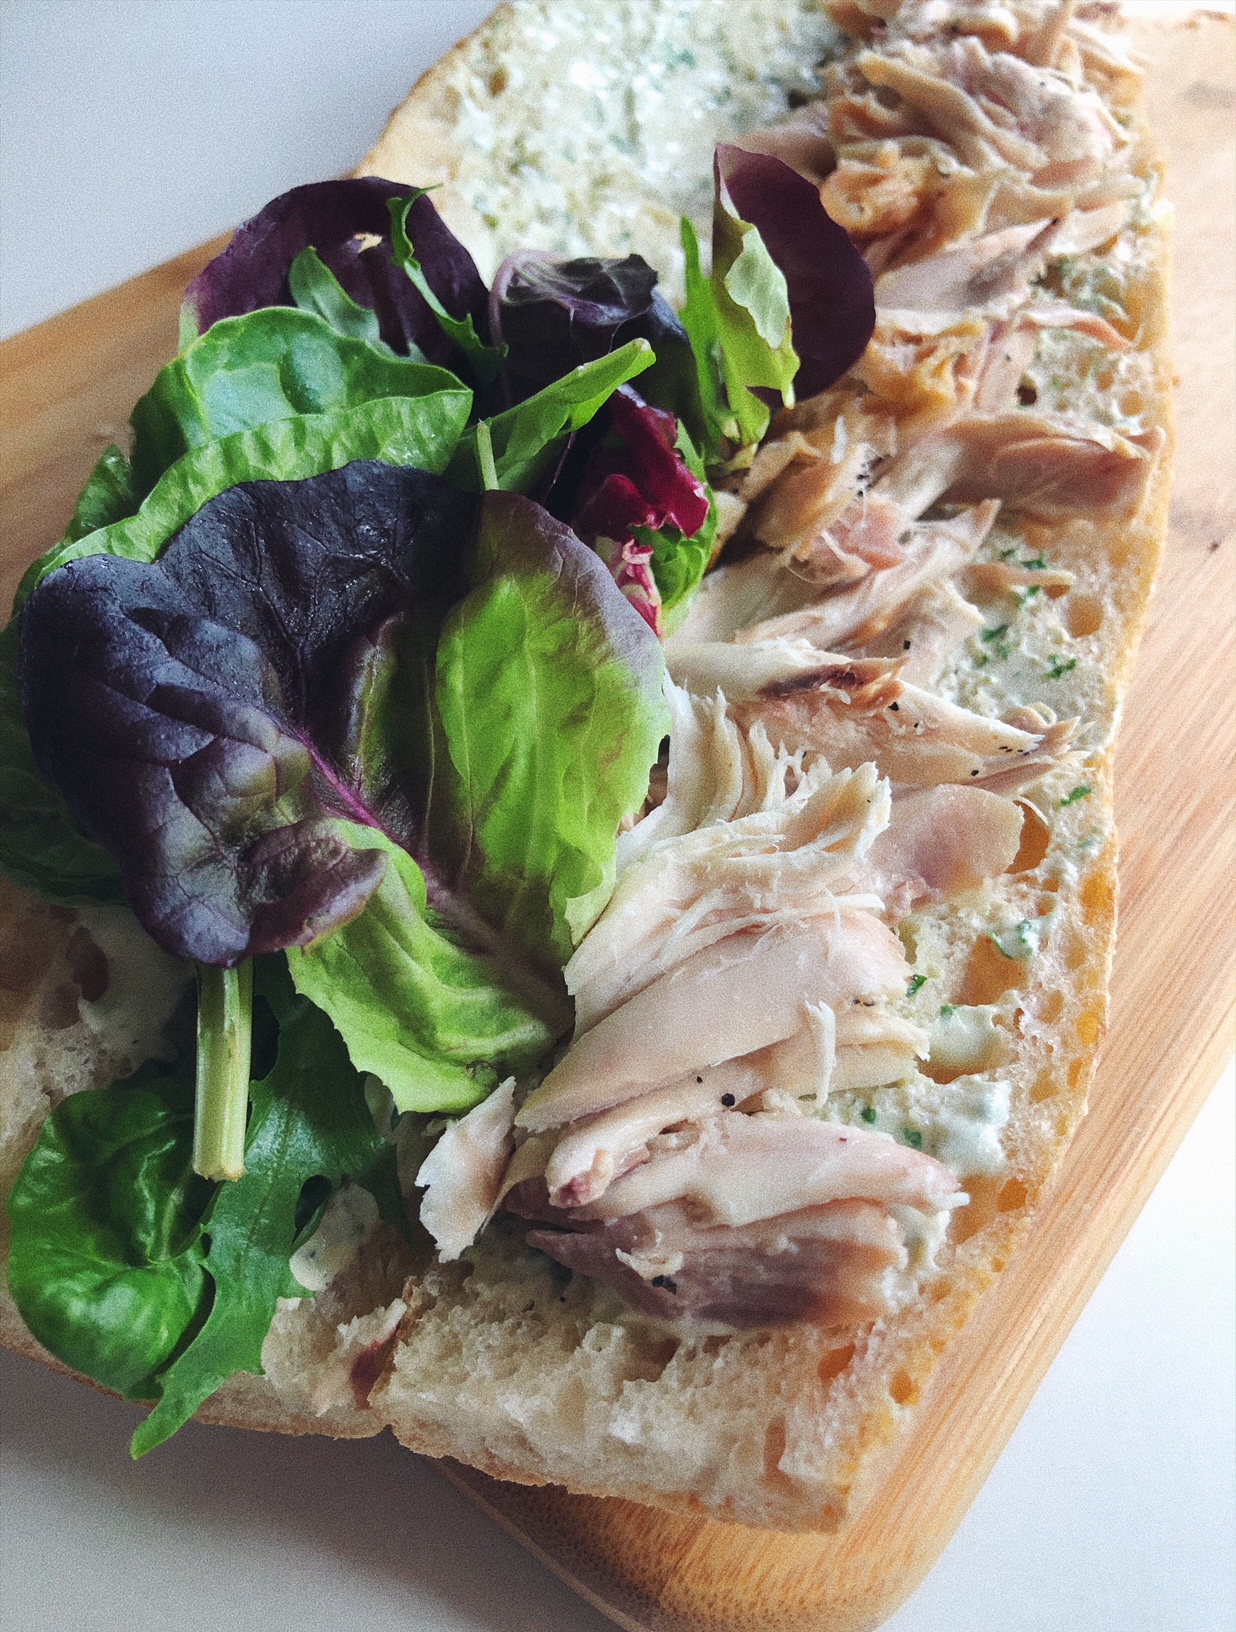
Enter - my go-to summer sammie. It's stupid easy to make, stays good for a couple days in the fridge, and is fairly light and transports well. It's the perfect summer snack for your outdoor concert, picnic, camping trip or backyard party.

the good

The original version of this sandwich involved Miracle Whip and store-bought pesto and chicken deli meat, so I decided to update the sandwich to make it a little more sophisticated and a little better for you. I included an omnivore and a veggie version because the more that get to enjoy this sandwich, the merrier.

The Cashew Basil Mayo is key to the flavor of this sandwich, so I highly suggest you make it. If you're in a pinch - high quality mayonnaise (like Chosen Foods or Primal Kitchen) + some fresh basil works great. You can use a store-bought pesto, but there's often dairy and questionable oils in them so keep an eye out.

This is one of the rare sandwiches that actually gets better as it sits in your fridge. The bread softens a little bit and the flavors get a chance to marinate. So you can make it up to three days ahead of time.

the medicine

Sourdough bread is what I recommend to my clients that are hooked on traditional store-bought loaves (which are often full of sugar and preservatives). Most are shocked when I tell them to go for this more satisfying bread. Why sourdough? First, the ingredients are minimal - no preservatives or added sugar. Second, because sourdough is fermented, some of the proteins are broken down, making it easier to digest. I still recommend cutting down bread intake, but if you're gonna do it, do it right with sourdough.

Cashews are full of healthy fats and trace minerals. They make the best dressing, dip, spread, etc. They work super well as substitutes in vegan and dairy-free recipes.

Greens... do I even have to say it? Add more greens whenever and wherever you can!

Organic chicken contains high-quality protein, essential minerals and vitamins such as vitamin D and B vitamins. If you choose to buy organic chicken (which I recommend you do), there is a much higher concentration of omega-3 fatty acids - essential to fight inflammation.

If you opt for the veggies - awesome. The more the veggies, the better - always! They're full of fiber and phytonutrients we need to thrive.

tips

Make this sandwich up to three days ahead of time.

I like to slice the baguette into sammies that are slightly different sizes for different appetites. Then I wrap each one in plastic wrap and store in the fridge.

You can get non-GMO, organic whole roasted chickens at Whole Foods for $9.99. It's cheaper than roasting your own - great for anyone who's busy or on a budget.

Go-To Summer Sammie: Omnivore + Vegan Version
 

Ingredients
1 sourdough baguette (preferably organic)
1 cup-ish Cashew Basil Mayo
3 cups mixed greens
2-3 cups shredded organic chicken OR
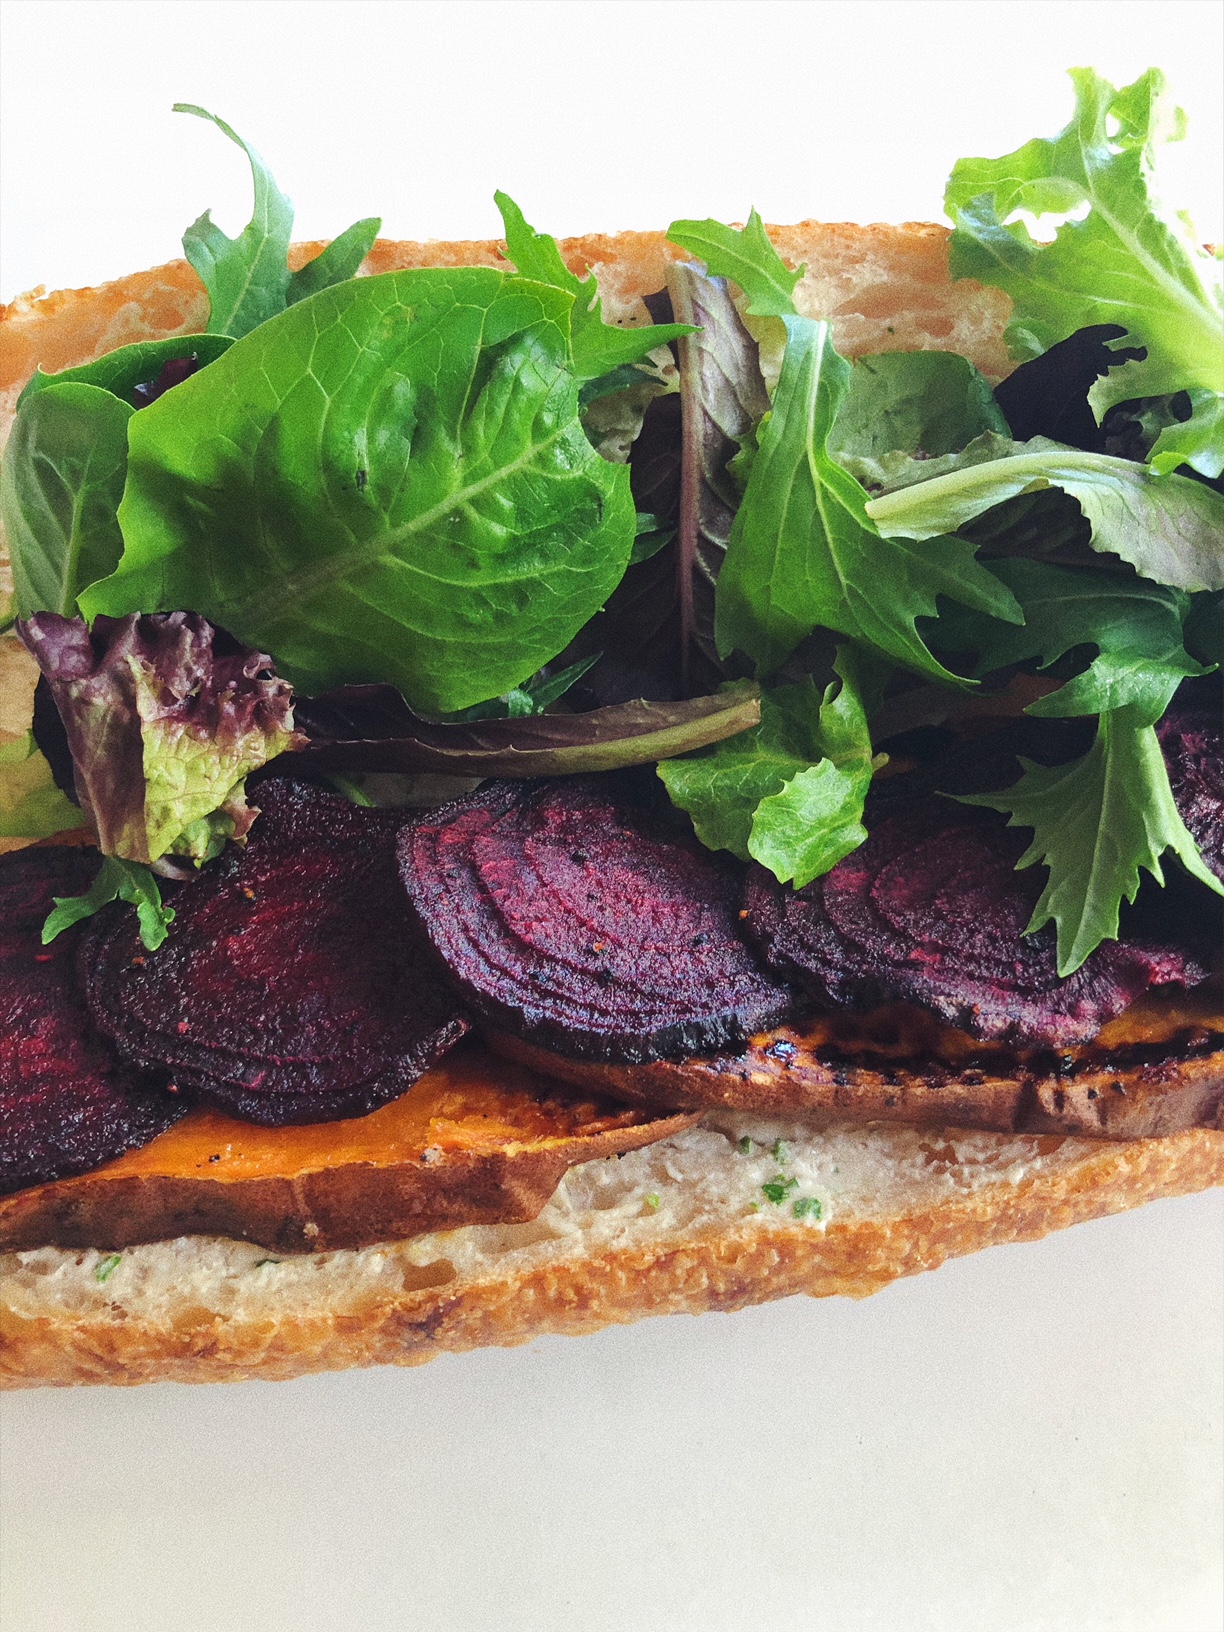
2-3 cups roasted or grilled veggies (zucchini, onion, beet, sweet potato, eggplant, etc.)

Cashew Basil Mayo
1 cup of cashews, soaked overnight
1/4 cup avocado oil
1/4 cup water
1 tbsp apple cider vinegar
1 clove of garlic
juice of 1/2 a lemon
1/2 tsp salt
pepper to taste
1/4 cup tightly packed fresh basil

Instructions

1. If you need to roast chicken or grill your veggies, do that now. In fact you can do it ahead of time.

2. Make Cashew Basil Mayo by adding everything except the basil into a blender or food processor. Blend until extremely smooth. If it's too thick and not blending, add water a tablespoon at a time until desired consistency is reached. You want this to be on the thicker side. Then add the basil and pulse several times until the basil appears to be small flecks. Transfer to a glass jar and set aside.

3. Set up your sandwich makin' station. Trim the ends of the baguette and set aside for a snack. Slice baguette length wise - open it up and "bend" it a little so it stays mostly open on its own. Spread each side generously with the Cashew Basil Mayo. If you're so inclined, sprinkle with a little sea salt + fresh ground pepper.

4. Line one side with chicken or roasted veggies. Line the other side with plenty of greens.

5. Close sandwich and make sure everything is tucked well inside. Slice into sandwiches of varying sizes and wrap tightly in plastic wrap or store in a tupperware container.

6. Store in the refrigerator up to 3 days. If you have mayo leftover, it will keep for up to a week in the fridge. Enjoy!

*Note: I'm usually pretty anti-disposable plastic items, but this is a really good way to keep the sandwiches stored without falling apart, and because I do it so rarely I give myself a pass on this one.